or

"Hey, I can do that!"


Sunday, May 23, 2010

LOST Finale!

LOST Series Finale Cake
(+5 skill points => 335/400)


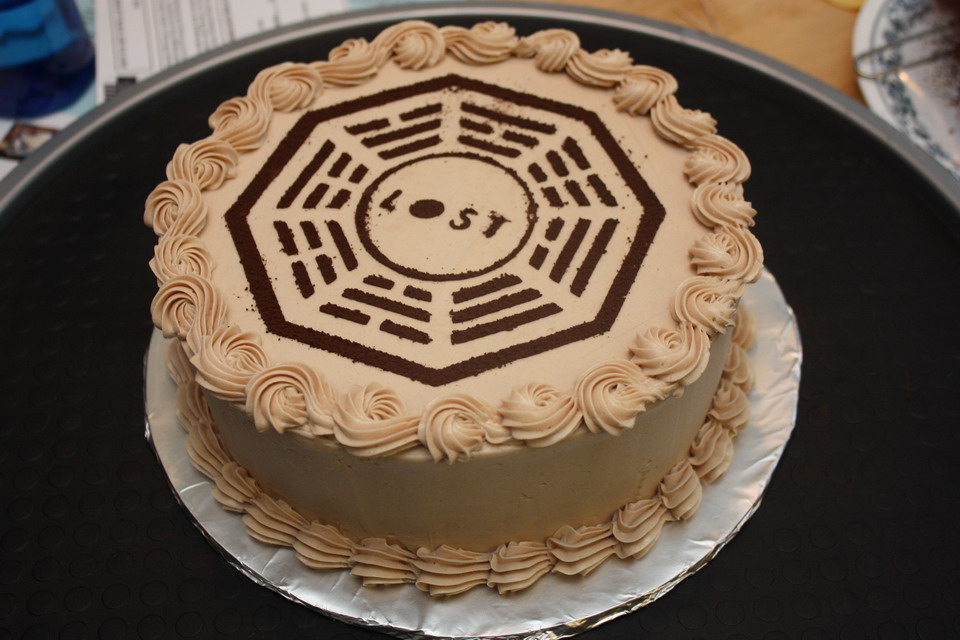
My husband and I attended a LOST finale episode get-together this evening.  We had a mini-junk food fest that ended with this peanut butter chocolate cake.  The finale was a little disappointing ... thankfully the cake was good ;)
Stats:
  • 8" round Duncan Hines Devil's Food cake mix (I thought "Devil" was appropriate considering the show)
  • coated with semi-sweet chocolate ganache
  • iced and filled with peanut butter chocolate IMBC
  • topped with cocoa using a stencil
  • shell and reverse shell borders
The grocery store was out of the Duncan Hines Dark Chocolate Fudge cake mix, which is my norm for chocolate cakes.  The Devil's Food cake performed adequately, though.  Now I'm not even sure how they taste different.  It was a little on the dry side, but it could be because I hadn't frozen this cake before hand.

It's been a while since I've used ganache to ice an entire cake.  I was being lazy and a bit rushed, so I wasn't very vigilante in making it correctly.  There were several chunks of chocolate chips that didn't get melted completely.  Meh, it wasn't for looks anyway.


    Since this cake was basically for me and my buddies, I got to choose the flavors.  I've been wanting to retry the peanut butter chocolate Italian meringue buttercream for a while now!  It was yummy.


    My hubby and I have been working a lot of overtime lately.  There wasn't many hours left in the weekend for me to spend on decorating cake, so I opted to make a stencil using my Cricut.  I asked people on the cakecentral.com forums for LOST cake ideas and several suggested to recreate the DHARMA logo.  The net has several LOST cakes that feature this, and it was a great idea for something simple and quick.


    I downloaded a LOST font and modified some of the characters to make my stencil using SCAL.

    http://www.dafont.com/lost-font.font
    http://shinymetalobjects.net/cake/LOST.scut2

    My first attempt consisted of using the stencil on the cake with the leftover ganache and that ended up to be a fail.  I didn't let the iced cake firm up hard enough in the freezer, so the stencil stuck to the icing and smudged it.  The ganache wasn't thin enough to really fill in the details of the stencil.  I, uh, lost the "LOST" in the middle completely.  I ended up scraping it all off and starting over.

    This time I used a technique detailed in Toba Garrett's book The Well-Decorated Cake.  She sifted cocoa powder over a stencil to recreate an image.  This worked pretty well for my first shot.


    Unfortunately I didn't take the time to make bridges in my stencil.  The stencil was actually 3 pieces placed together on the top of the cake, so some cocoa powder fell on to the negative space as I was trying to lift each piece off off.  I also accidentally threw away the center of the "O" when I was making the stencil, so you can see it's completely filled in with powder.  It was really great to finally get to try this technique and it saved me some time rather than trying to figure out how to re-do things.


    I was pretty pleased with how this casual cake turned out and its taste.  It even looked pretty sliced.  We had a great time re-capping and watching the end of LOST!  Some day I'll actually go back and watch all of the episodes I had missed.

    Sunday, May 16, 2010

    Macarons!

    My 1st Macarons!


    A macaron is a confectionery whose name is derived from an Italian word “maccarone” or "maccherone". This word is itself derived from ammaccare, meaning crush or beat, used here in reference to the almond paste which is the principal ingredient.. It is meringue-based: made from a mixture of egg whites, almond flour, and both granulated and confectionery sugar.
    Not to be confused with Macron or Macaroon.
     After reading an article about macarons in the cakecentral.com magazine, I just had to know what all the hub-bub was about.  There was a beautiful, and I mean beautiful post with a recipe and instructions on http://www.baking911.com.  There was also an ultra cute post for making macarons that looked like cheeseburgers.  Here's how my first batch went.

    I didn't bother looking for "almond flour".  Many people on the net claimed that it was hard to come by and even if you found it, it wouldn't be very fresh.  baking911.com included instructions on how to make your own.  A couple weeks ago, I stripped my almonds and froze them until today.


    I blanched a bag of plain almonds so the skins could loosen up and pull away.


    It didn't take long for me to figure out that peeling off the skins sucked.  I've been working a lot of overtime and the last thing I needed was to be hunched over the kitchen table fumbling around with little slippery almonds.


    After what seemed like eternity, I got a groove going.  Hold the almond between your thumb and index and middle fingers.  Make a snapping motion. 


    With your thumb going one way and your fingers going the other, it's enough to split the skin open.  The pressure between your fingers and the almond is enough to eject the nut out of the split skin.  Have your free hand cupped over your snapping hand.  It will catch any pop-fly almonds and is in a good position to take the naked nut and put it somewhere to dry.


    I'm not sure how fine I needed to grind it, but I think I reached as fine as my mini food processor could get it.  This is my ground almonds with powdered sugar.


    I followed the instructions for leaving the egg whites out and warming them etc., etc. ... I'm not sure if it really helped.  I may have over-whipped them.  They weren't supposed to reach stiff peak stage, but I think it got out of hand.


    The final mixture should have resembled runny cake batter ... sure.  I guess this is it.


    Trying to draw circles on to the parchment paper with a compass proved to be impossible.  The needle wouldn't stay in one place.  After a couple tries, I said screw it and just eye-balled some 1 1/2" - 2" circles.


    I let the batter sit and tapped it every once in a while to release the bubbles ... did it help? 


    I must have done something right.  They looked pretty good for my first try.  I even got some feet!


    In case you're wondering, the "foot" of the macaron is the small height you get on the cookie nearest the sheet.  This is apparently hard to achieve for beginners. 


    I did have a few flops.  One sheet had too little batter for each cookie.  They burned a little on the bottom and weren't as doughy on the inside.  They were foot-less as well.


    Weeks ago, while I was toiling away peeling a mountain of almonds, I thought to myself, "These better be the best freaggin cookies I've ever eaten!"  And you know what?  They were pretty freaggin good.


    I put dark chocolate ganache in between two cookies and handed it my husband.  He didn't have a plate, so he just stuck the entire thing in his mouth.  He told me they were like mini smores.  He loved how they were chewy on the inside.  I love it too.  We'll polish off my first batch of macarons very soon!

    FAILs:
    • I think I over-whipped the egg whites.
    • I couldn't get the almonds well-ground in my dinky food processor.
    • Cookies could have been piped larger.
    • Not sure why the pros' macarons have such smooth tops ... could be because the almonds were so finely ground and the batter could be runnier.
    FTWs:
    • Little feet!
    • Tasted great!
    UPDATE (05/19/10)
    I read another site about making these little darlings and it said:
    • for the foaming egg white stage, think bubble bath
    • for the whipped egg whites, think shaving cream

      Thursday, May 13, 2010

      Welcome, Baby Lenore!

      Welcome, Baby Lenore!
      (+5 skill points => 330/400)


      FINALLY, I had an excuse to make a World of Warcraft cake.  I know a new baby girl doesn't sound like a good excuse, but it really was!  My co-worker received the latest addition to his family on Tuesday.  His whole household (himself, his wife, son, daughter, and daughter's b/f) used to play WoW together.  What better way to welcome Baby Lenore than with a cake "FOR THE ALLIANCE".  Um ... don't worry if you don't understand any of this ... 

      Stats:
      • 8" round Duncan Hines White box cake
      • filled and iced with IMBC
      • used stencil to ice lion
      • shell and reverse shell borders with tip #17
      • script with tip #4
      My co-worker's wife loves purple, so I used Wilton's Violet coloring gel to get a nice color for my IMBC.  After filling, crumb coating, and icing the whole cake, I popped it into the freezer to firm up.


      I wish I had more time to play with my Cricut.  It's such a cool toy.  I took a jpg I found of the Alliance emblem and doctored it up a bit.  I needed to add some bridges so the stencil wouldn't fall apart or be too intricate in certain places.  Here's the image after a little work in Photoshop:


      When I "traced" the image into SCAL (Sure Cuts a Lot, software to manipulate and cut images with a Cricut), I was able to drop the outer border line that wasn't necessary.  My circle cutter easily sliced me a 10" circle from some 20 gauge clear vinyl.  When I popped it into the Cricut, I used blade depth 5 with medium pressure.  It cut beautifully!


      I pressed the vinyl on to the cold cake, firmly going over all the edges so there would be no leaks.  Room-temperature IMBC was smeared over.  The cold purple icing helped firm up the cream icing, so I let it sit for a moment.  I didn't want to remove the stencil too soon or the remaining icing might smudge.


      After carefully removing the stencil, I only managed to smudge a minor section.  It looked great otherwise!


      Baby Lenore couldn't ask for a better guild family to be a part of.
      Congratulations, Sky and Mel! 


      Happy 1st Birthday, Zoey!

      Happy 1st Birthday, Zoey!
      (+5 skill points => 325/400)


      Last weekend we celebrated my little girl's very first birthday.  What stinks is that my husband and I have both been busy working overtime and didn't have much time to prepare for her party.  I'm sad that I didn't get to go all out for her cake, but it still turned out cute and she eventually dug into her smash cake.
      Stats

      "Watermelon" Party Cake:
      • 8" round Duncan Hines Red Velvet box cake
      • filled with whipped cream cheese pudding
      • iced with pink and green IMBC
      • dark chocolate chips (as seeds)
      "Watermelon Slice" Smash Cake:
      • 6" round Duncan Hines French Vanilla box cake, cut to resemble a slice of watermelon
      • iced with pink and green IMBC
      • dark chocolate chips (as seeds)


      I must apologize first.  We were so busy and strapped for time before the party, I didn't have a chance to stop and take pictures of the process.  But here's what I did.
      There were so many great "watermelon cakes" on cakecentral.com's gallery.  One in particular had me wondering how she got the red icing in such a clean and precise circle.  I decided to try the frozen buttercream transfer technique.  I traced a 7 1/2" circle on to parchment paper.  My pink icing got piped into that circle to about 1/2" thick.  Using a butter knife I tried to smooch the icing together.  It sat in the freezer while I torted, filled, and crumb coated the cake.  My disc-o-icing was pretty firm by then and I was able to peel the paper off and place it on top of the cake.  You could see the "worms" of icing that I had piped on that didn't get smooched down.  I used some room-temperature icing and glided it along the surface to seal in all those imperfections.  It looked so flat and smooth!  I may just have to do this with my normal cakes!

      I had JUST enough icing to do both the party cake and the smash cake.  When it came to sing happy birthday, little Zoey wasn't sure what to do.  I stuck her hand into the cake.  Once she realized it was food, she gradually began to chow down!


      Happy Birthday, Zoey!

      1st DIY Dessert Stand

      1st DIY Dessert Stand


      For my little girl's 1st birthday party, I wanted a little assortment of desserts.  I made this dessert stand to hold cupcakes and her party cake.

      Stats:
      • 10" and 12" rounds made of foam board
      • 4" tall x 5" diameter PVC couplers
      • wrapped with gift paper and clear contact paper
      There are several people who make their own cake boards out of foam board.  After some shopping, I was in a good position to become one of those people.  I got a sheet of 3/16" thick 20"x30" foam board from Hobby Lobby at $1.99.  I also bought a circle cutter for $19.99 and a cutting mat for $9.99.  


      Unfortunately the cutter was intended for paper and cardstock, so the blade isn't deep enough to cut the foam board.  After the "pilot" cut (the blade only penetrate the first layer of poster board), I cut the rest of the circle with a blade.

      One evening many weeks ago, I dragged my husband to Home Depot to look for separators for this stand.  We found some PVC couplers in the piping sections.  These are 4" wide (er, or tall?) and 5" in diameter.  He believed we could find an alternative solution, but I insisted if the can of mixed nuts at home worked out, I could return these ... the couplers were only $2 each.


      I really liked the couplers.  They were very sturdy, had a good weight, and were a good height for cupcakes.  So from the bottom down, we've got:
      • 8" cake dummy,
      • 8" circle,  
      • coupler, 
      • 10" circle, 
      • coupler, 
      • 12" circle

      After cutting out a strip of wrapping paper, another larger strip of contact paper was stock to the "right" side.  I rolled that around a coupler and allowed the edge to stick to itself. 


      Then I cut strips at each end so they could be folded over.


      Ta-da!  Nice, pretty, and re-usable separator.


      Each cake circle got covered in the solid color wrapping paper and contact paper.  The bottom circle got "feet" made of baby food jar lids.


      I can really imagine this stand getting even fancier with some trim along the edge of the circles.


      The whole thing is hot-glued together, but it'd would be super easy to disassemble and reuse.  The only work would be to peel off all the contact paper and start over!

      As Seen On

      As Seen On Capital Confectioners